Without fail making ultimate Vickys Minion Bob Cake (Decorating Idea) easy, delicious, practical.
Good Evening every body, at this time you get present recipe Vickys Minion Bob Cake (Decorating Idea) with 13 ingredients and 45 steps. Below this is how to prepare, please pay attention carefully.
In cooking there are several levels that should be done, starting to prepare ingredients, cooking tools, and also understand method start from beginning to cooking is ready to be served and tasted. Make sure you has enough time and no is thinking about something else, because will cause the food to burn, taste no suitable desired, and many others. Immediately, below are 13 ingredients and 45 stages of easy cooking Vickys Minion Bob Cake (Decorating Idea).
Ingredients all Vickys Minion Bob Cake (Decorating Idea)
-
Prepare : batter for 2 x 8" layer cakes (4 layers in total).
-
Needed 1 : x 1 litre (UK) glass pudding basin or half ball tin.
-
Prepare 3 : x 6"x 3" deep round cake tins.
-
Prepare 800 g : buttercream - I made mine w 300g Stork & 600g icing sugar.
-
Prepare : and just a splash of vanilla extract to loosen it.
-
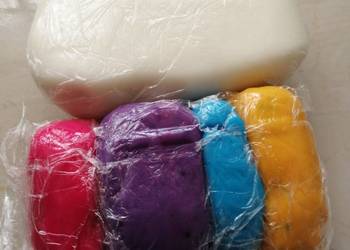
Prepare : fondant ready roll icing:.
-
Prepare 500 g : yellow.
-
Needed 250 g : blue.
-
Needed 75 g : white.
-
Prepare 75 g : black.
-
Needed : silver lustre powder.
-
Prepare : cocoa powder.
-
Needed : water.
If all ingredients Vickys Minion Bob Cake (Decorating Idea) it’s ready, We’re going into the cooking stage. Below is how to serving with relaxing.
Stages Cooking Vickys Minion Bob Cake (Decorating Idea)
-
You can use any cake recipe you like. Most cake recipes are for an 8" layer. This is absolutely fine. Don't scale them down. Just use your leftover batter to make a couple of cupcakes. For this cake I have used my chocolate avocado cake recipe, doubled.
-
Preheat the oven to gas 3 / 160C / 325F and grease the pudding basin well with some spray oil. Cut a circle of baking paper for the flat part on the bottom of the bowl and put it in.
-
Make up your cake batter. For each layer you need enough batter to fill 1 x 6" round cake tin or a loaf tin. This is around 2.5 - 3 cups or 900g - 1000g worth of batter. This is enough to fill the pudding basin 3/4 full too. This equalled half of my avocado cake recipe so to make this cake, I made half of that particular recipe 4 times.
-
Put the bowl cake in the oven for 75 - 90 minutes. A toothpick test will show when it's ready. Don't be tempted to open the oven door before the 75 minute mark and be sure to bake the basin on top of an oven tray in case the batter overflows.
-
While the cake is baking you can make the minions goggles.
-
Roll out some white fondant so it's 1/2 cm thick.
-
Use a round cookie cutter (I used a 2cm wide one) to cut the initial shape from, then use another cutter a size smaller to cut the middle out of it.
-
Repeat so you have 2.
-
Pinch off some icing from an offcut and roll into 14 little balls. Squash them down a little bit.
-
Dab with a bit of water, stick both goggles together then stick the balls around them.
-
Use a little silver lustre dust, spray or food dye to 'paint' the goggles. Set aside to dry.
-
Using the same sized cutter you used for the outer goggles, cut another 2 circles for the eyes.
-
I used some cocoa powder added to some of the white icing and make little balls to make the iris.
-
Add a tiny ball of black for the pupil. You could use edible ink for this too.
-
Stick it all together with the gogges on top and let dry. Squash the edges where the goggles will meet a wee bit like this and colour the rim of the eyes to match the goggles.
-
Also make feet by shaping some black like this about an inch and a half high so they look like the soles of shoes.
-
Once the bowl cake has baked, turn up the oven to gas 4 / 180C / 350F and bake the 3 layers of 6" cakes for 60 - 75 minutes or until done.
-
Let each layer cool completely then wrap in clingfilm and chill in the fridge for a few hours so they'll be easier to cut later.
-
Trim up each layer to even the tops and sides.
-
Then cut each in half horizontally.
-
Start to stack the layers on a cakeboard, sandwiching a thin layer of buttercream icing inbetween each one.
-
Put the bowl cake on the top and you can see your basic minion form now.
-
Use some cake dowelling to hold the structure together - I have just used thin wooden barbeque skewers trimmed to fit the height of the cake.
-
Spread the entire cake with a thin layer of buttercream to catch any crumbs and chill in the fridge for an hour to set.
-
Spread another thin layer of buttercream over the top of that, smooth down again then you're ready to start with the decorating.
-
Starting with the yellow, roll out into a circle wide enough to cover the bowl cake.
-
Smooth down and trim with a sharp knife where the centre of the eyes would cover the overlap.
-
For the body roll out more yellow in a large rectangle wide enough to wrap around the circumference of the cake, around 20 inches long by 8 wide.
-
Smooth down and trim off at the join.
-
Roll out blue the same length but only 3 or so inches high to make the bottom part of the minions dungarees.
-
Wet the back with a tiny bit of water to help it stick and smooth it down. Join at the front if you want to as we'll cover it anyway.
-
Roll another square around 8"long by 4" wide and cut into this shape.
-
Wet the back and position over the join, creasing slightly at the bottom to give the illusion of pockets. Add some stitching detail with a blunt knife or craft roller if you like.
-
Trim 2 long thin straps for the dungarees. Wet and stick on to the front corners at the front and at the back.
-
Cut a small pocket shape, wet the back and stick to the front, again adding stitching detail if you want to. Use 2 stubby cylinders to make short legs.
-
Wet the shoes and stick to the bottom of the legs.
-
Roll the leftover yellow into 2 thin snakes. These will be the arms. Offer them up to the cake directly under the dungaree straps and trim to size to reach the pockets.
-
Position and stick the arms on with some water. Push the ends carefully into the pockets.
-
Roll out 5 small black buttons and stick 4 onto where the straps meet the body and one for the pocket.
-
Carefully stick the eyes & goggles on right over that head join.
-
Roll out a thin strip of black for the goggle strap.
-
Stick it on over where the 2 joins meet on the head.
-
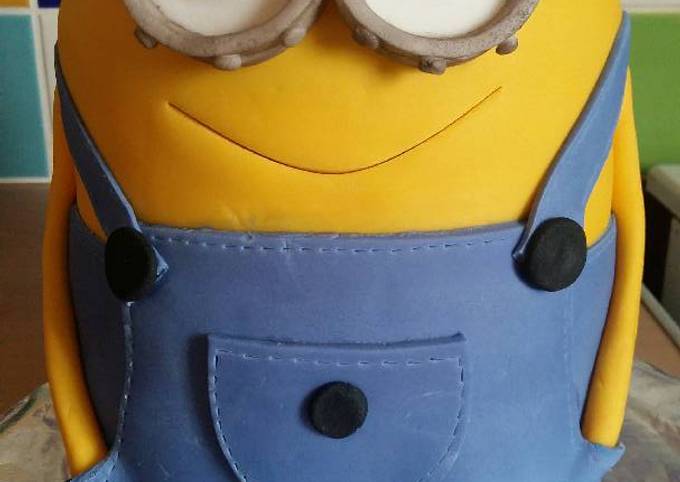
Use a blunt knife to indent a smile on the minions face.
-
Done! Wasn't that easier than you thought?! Side view.
-
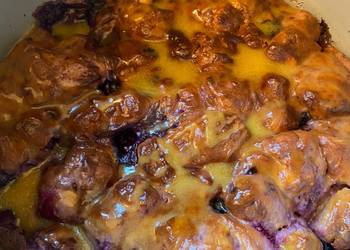
Cut view.
Like that formula easy make with set recipes Vickys Minion Bob Cake (Decorating Idea), you also do look for more recipes cuisine other interesting on site us, available thousands of various recipes world food and we will continue to add and develop. Starting from culinary healthy easy, tasty, and nutritious to culinary fatty, hard, spicy, sweet, salty acid is on our page. Thank you for reading the ultimate recipe Vickys Minion Bob Cake (Decorating Idea).